Setting Up the Integration
Last updated: May 29, 2026
This article walks through everything you need to do in HubSpot and SmartRec before the integration can sync data.
Step 1 — Prepare HubSpot
A few objects and associations need to be activated in HubSpot before you connect. This requires a HubSpot super-admin.
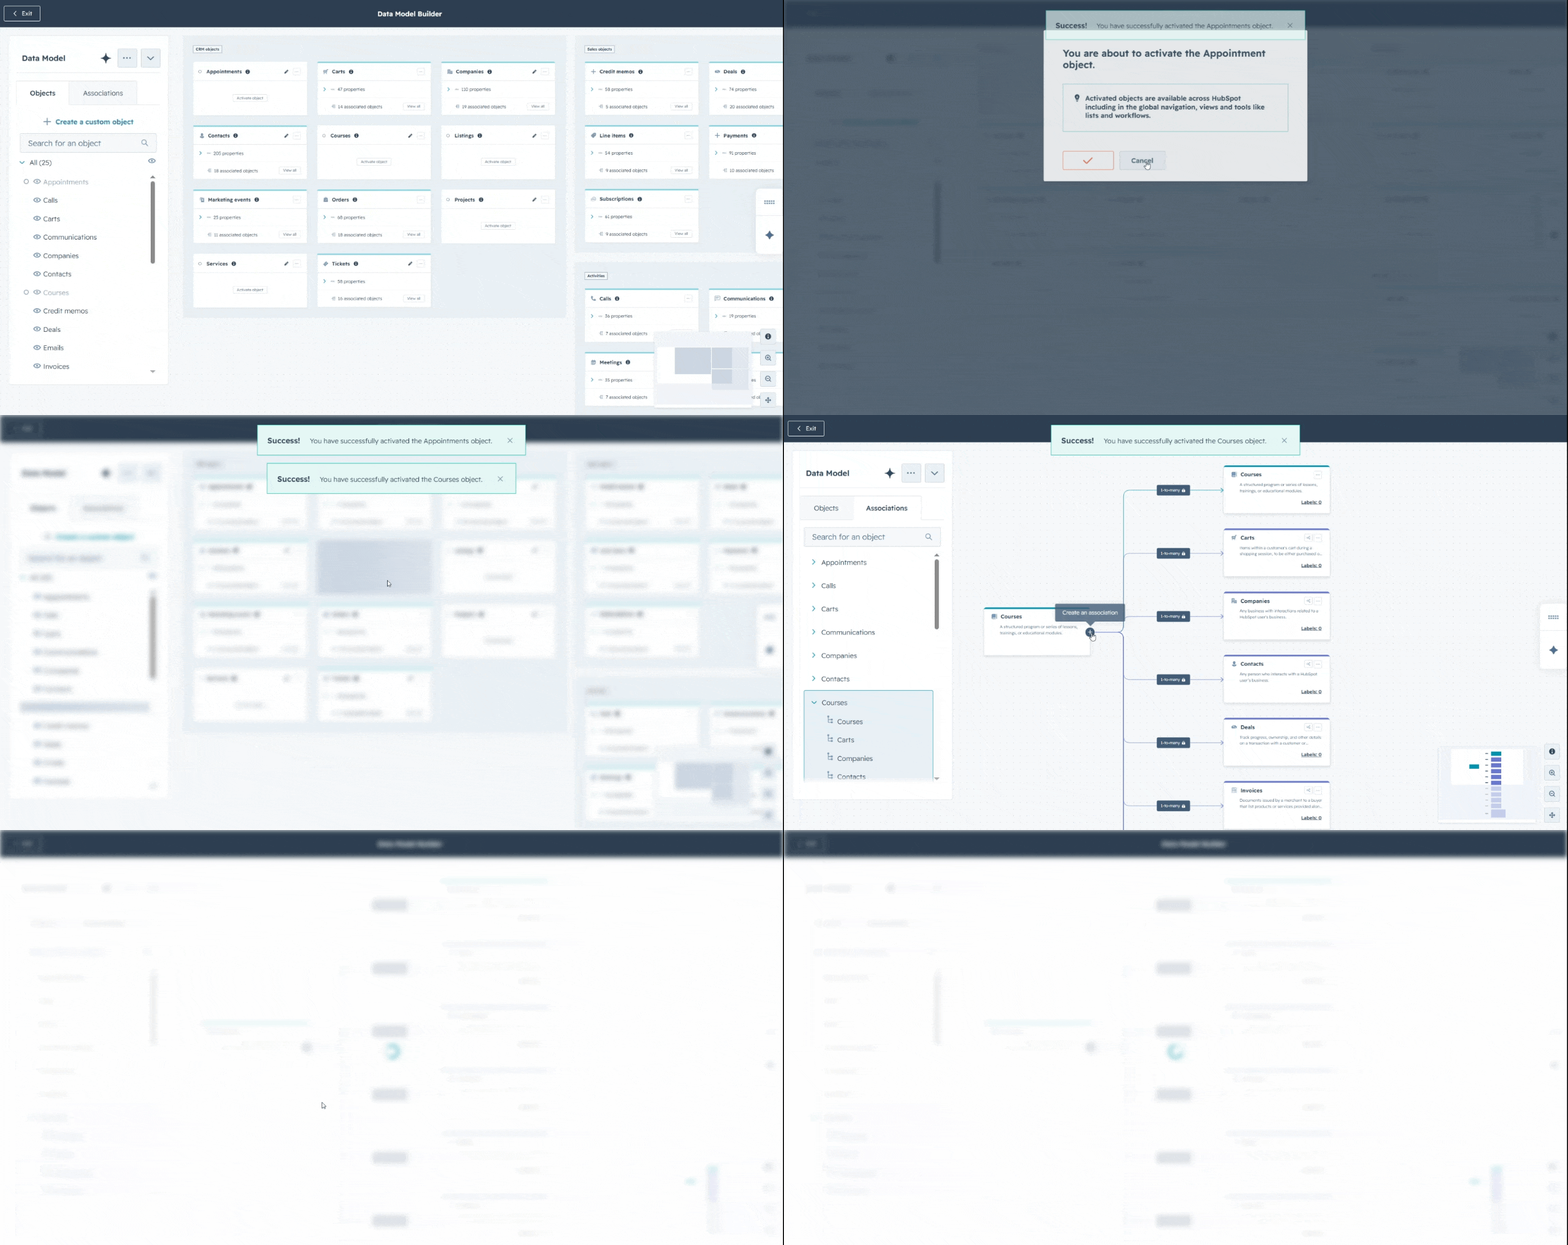
Activate Appointments and Courses
The integration syncs SmartRec Registrations to HubSpot Appointments and SmartRec Activities to HubSpot Courses. Both objects need to be activated in HubSpot first or those records will be invisible to you.
You also need to enable the default Appointments ↔ Courses association — this only needs to be done from one of the objects, and it lets the integration link registrations to their parent activity.
App Objects and App Events
The integration also creates two App Objects (Locations and Memberships/MultiPasses) and one App Event (Person Access Scan). These are created automatically when the integration is authorized — no manual activation needed.
Note: App Object and App Event properties are managed by the integration and cannot be edited in HubSpot. This is a HubSpot limitation, not an integration setting.
Step 2 — Authorize HubSpot
The integration connects to HubSpot via OAuth (Amilia SmartRec app, ID: 27939345). When you click "Connect HubSpot," HubSpot prompts you to approve a list of scopes.
The scopes requested, grouped by object family:
Contacts — read/write objects and schemas
Deals — read/write objects and schemas
Appointments — read/write objects and schemas
Courses — read/write objects and schemas
AmiliaSmartRec Locations (App Object) — read schemas, write properties, view/create/edit/delete objects
AmiliaSmartRec Memberships/MultiPasses (App Object) — read schemas, write properties, view/create/edit/delete objects
Person Access Scans (App Event) — timeline access
Step 3 — Provide SmartRec credentials
The integration authenticates to the SmartRec API (v3) with a bearer JWT token, which it generates from:
SmartRec username
SmartRec password
Organization ID (required for every API call)
For multi-organization (network) setups, you'll provide credentials and an Organization ID per branch. See Multi-Organization Support.
Step 4 — Initial backfill
Once both sides are authorized, you can trigger a historical sync to backfill your existing SmartRec data into HubSpot. See How Sync Works for the default date ranges per data type.
After setup
Real-time webhooks start flowing immediately for new SmartRec activity
Scheduled syncs (Locations, product catalog, Activity Occurrences, Access Scans) start running at their daily times in your local timezone